
Blog
The Everyday Fresh-Milled Sandwich Loaf That Isn’t a Brick

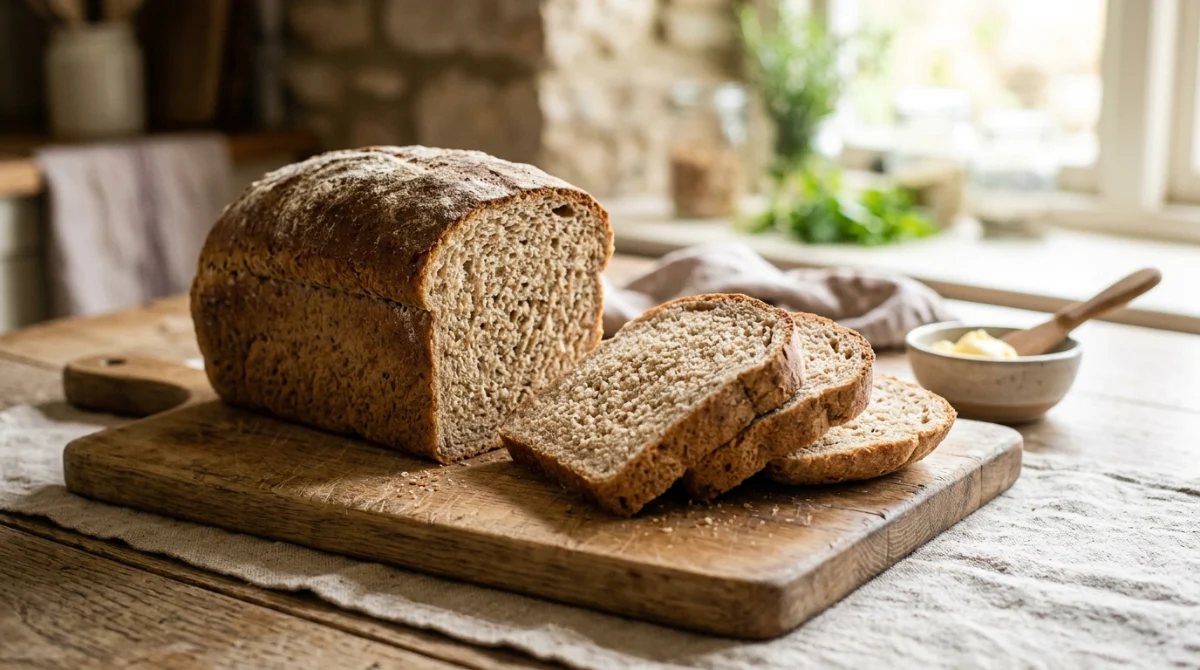
The trick to a soft 100% wholewheat fresh-milled sandwich loaf is a scald: pour boiling water over a tenth of your flour, let it cool, and add it to the dough. The gelatinised starch holds onto water that would otherwise leave during baking, and you get a loaf that slices thin without crumbling and is still soft on day three. Everything else (the yeast, the tin, the timings) is ordinary bread making.
This is the loaf for Tuesday. It is not sourdough, it does not need a Dutch oven, and it does not need eighteen hours of planning. Mill in the morning, eat it with supper. If you have been making the 70/30 sourdough and want something for sandwiches and toast that fits into a working day, this is it. Total time: about 4 hours, of which maybe 25 minutes is work.
On this page
- Why does 100% fresh-milled bread come out dense in a tin?
- What is a scald and why does it work?
- How fine should I mill for a sandwich loaf?
- The recipe
- Step by step
- How do I keep it soft for four days?
- Do I need vital wheat gluten?
- When it goes wrong
- Can I make this with sourdough instead?
- Frequently asked questions
- Mill it on a Sana
Why does 100% fresh-milled bread come out dense in a tin?
Three reasons, and they compound.
The bran cuts the gluten. Fresh-milled wholemeal is full of sharp bran particles that behave like tiny blades in the dough, physically severing gluten strands as they try to form. Less gluten network means less gas trapped, which means a tighter crumb and a loaf that doesn’t climb.
The bran drinks the water, then gives it back. Bran absorbs water slowly and holds a lot of it. Early in the mix, the dough feels stiff and you are tempted to add flour. An hour later the same dough has gone slack, because the bran has finished hydrating and released some of that water into the gluten. Beginners add flour at exactly the wrong moment and end up with a dry dough.
It dries out fast after baking. Even a good wholewheat loaf goes from lovely to cardboard between Tuesday and Thursday, faster than a white loaf, because the bran continues to compete for moisture inside the finished loaf.
The scald addresses the first and third directly, and the resting step below handles the second.
What is a scald and why does it work?
A scald, which you may know as a tangzhong or a yukone, is a paste of flour cooked with water hot enough to gelatinise the starch. Gelatinised starch can hold roughly three times more water than raw flour, and it holds it through baking rather than letting it evaporate.
What it actually buys you:
- A softer, more tender crumb, because there is more water in the finished loaf.
- More total water in the dough without the dough feeling wet to handle. This is the real win with fresh-milled flour, which wants a lot of water.
- Noticeably slower staling. Gelatinised starch retrogrades more slowly, so the loaf is still good on day three and toast-worthy on day four rather than day two.
For this loaf we scald 60 g of the flour with 180 g of boiling water, a 1:3 ratio that gives a thick paste rather than a pourable one. That is 12% of the flour, which is at the generous end. Whole grain can take it.
It takes two minutes and it is the difference between this loaf and the brick.
How fine should I mill for a sandwich loaf?
Finest setting. This is not the place for rustic texture.
Use your mill’s finest usable setting. (EcoHub explains how to find it on a stone mill.) A finer grind means smaller bran particles, and smaller bran particles do less damage to the gluten, which matters more in a tin loaf than anywhere else.
A few things worth knowing:
- Mill 500 g and it takes about five minutes on the 360 W mill, or two and a half on the MAX. The 850 g hopper holds comfortably more than this loaf needs.
- If the motor labours on the finest setting, mill in two passes: once coarse, then run the flour through again on fine. It is faster overall and keeps the flour cooler.
- Let the flour sit for ten minutes before you use it. It comes off the stones slightly warm, and warm flour will push your fermentation faster than you expect.
Use hard red or hard white wheat. Hard red gives a more assertive, nuttier loaf; hard white is milder and a little sweeter, and it is the better choice if you are converting a household that is used to shop white bread. Don’t use soft wheat, which has too little protein for a tin loaf that has to hold its own height.
The recipe
Makes one loaf in a 1 kg (2 lb) tin, about 22 × 11 × 7 cm.
The scald
| Ingredient | Weight |
|---|---|
| Fresh-milled wholewheat flour | 60 g |
| Boiling water | 180 g |
The dough
| Ingredient | Weight | Baker’s % |
|---|---|---|
| Fresh-milled wholewheat flour | 440 g | (88 of 100) |
| The cooled scald | all of it | — |
| Water, lukewarm | 220 g | — |
| Instant dry yeast | 7 g | 1.4% |
| Fine salt | 10 g | 2% |
| Honey | 30 g | 6% |
| Butter, soft | 30 g | 6% |
| Vital wheat gluten (optional) | 10 g | 2% |
Totals: 500 g flour · 400 g water · 80% hydration · dough weight about 977 g.
A note on the fat and the sweetener, because the usual advice for fresh-milled bread is to leave oil out: the germ oils are already in there. That holds for a hearth loaf. A sandwich loaf is a different thing. The 6% butter is doing structural work on the crumb’s softness and shelf life, not adding richness for its own sake, and the honey feeds the yeast and helps the crust colour, which matters because wholewheat crusts otherwise look pale and underdone.
Step by step
1. Mill the flour — 5 minutes
500 g of hard wheat on the finest setting. Set aside 60 g for the scald.
2. Make the scald — 2 minutes, then 30 minutes to cool
Put the 60 g of flour in a small bowl. Pour the 180 g of boiling water straight over it and stir hard with a fork until it is a smooth, thick paste with no dry lumps. It will look like wallpaper paste. That is correct.
Cover and leave to cool to lukewarm, about 30 minutes, or 10 in the fridge. Do not add it hot. It will kill the yeast.
3. Mix — 5 minutes
Combine the remaining 440 g flour, the yeast, and the vital wheat gluten if you’re using it. Add the cooled scald, the 220 g of lukewarm water and the honey. Mix until no dry flour remains. Hold the salt and butter back for now. The dough will look rough and slightly stiff. Leave it alone.
4. Rest — 30 minutes
Cover the bowl. This is the step that stops you making the classic mistake: the bran needs half an hour to finish absorbing water, and the dough you come back to will be visibly slacker and softer than the one you left. If you judge the hydration before this rest, you will judge it wrong.
5. Add salt and butter, then knead — 8 minutes
Add the salt and the soft butter. It will feel like the dough is coming apart as the butter goes in. Keep going; it comes back together.
- By hand: 8–10 minutes of slap-and-fold on an unfloured counter, or ordinary kneading if you prefer.
- In a stand mixer: 5–6 minutes on speed 2 with the dough hook.
You are looking for a dough that is smooth, tacky but not sticky, and that pulls away from the bowl in one mass. A windowpane test on wholewheat will never be as translucent as white flour. If you can stretch a piece thin enough to see light through it before it tears, that is good enough.
Don’t over-knead. With fresh-milled flour, past a certain point you are cutting gluten faster than you are building it. Eight minutes by hand or six in the mixer, and stop.
6. Bulk rise — 60 to 75 minutes
Cover and leave somewhere warm until the dough has risen by about 75%, not quite doubled. At 24–26 °C expect 60 minutes. In a cold Highveld kitchen in July, budget 90 minutes and find a warmer spot: an oven with just the light on sits at about 28 °C.
7. Shape — 5 minutes
Tip the dough onto a lightly floured counter and press it out into a rough rectangle about 20 cm wide and 25 cm long, knocking out the big bubbles as you go. You want the width to match the length of your tin.
Roll it up tightly from the short end, like a Swiss roll, pinching the seam closed as you go. Tight is the operative word, because a slack roll leaves gaps that become holes in your sandwich slices. Place it seam-side down in a greased tin.
8. Final proof — 45 to 60 minutes
Cover loosely and leave until the dough has crowned about 1 cm above the rim of the tin at its highest point. It’s the most reliable visual cue in the recipe. Too early and you lose oven spring; too late and the loaf collapses in the oven or tears down one side.
Poke the side gently with a floured finger: the dent should fill back in slowly, over two or three seconds. If it springs straight back, it needs longer. If it stays dented, get it in the oven now.
Preheat the oven to 200 °C while it proofs.
9. Bake — 40 to 45 minutes
200 °C for 15 minutes, then 180 °C for a further 25–30 minutes. The colour you are after is deep brown, not golden. Wholewheat looks done well before it is.
Check the internal temperature. This matters more than the clock. A skewer thermometer in the centre of the loaf should read 96–98 °C. Below 94 °C and the middle will be gummy no matter how good the crust looks. This is the most common failure in wholewheat tin loaves and a R120 probe thermometer eliminates it permanently.
If you want a soft crust, brush the top with butter the moment it comes out.
10. Cool — 2 hours. Properly.
Turn it out of the tin immediately and cool on a wire rack. Wait two full hours before slicing.
Cutting a hot loaf lets the steam out before the crumb has set, and the interior collapses into something gummy and slightly damp. It is not underbaked; it is under-rested. Two hours. The loaf will still be warm, and it will slice cleanly.
How do I keep it soft for four days?
- Cut side down on a board, or in a cloth bread bag, for the first two days.
- Plastic bag from day two. Yes, it softens the crust. For a sandwich loaf that is what you want, and the trade is worth it once the crust has had its day.
- Never the fridge. Refrigeration stales bread faster than room temperature does. It sounds wrong, but it’s true.
- Slice and freeze on day two if you won’t finish it. Frozen slices go straight into the toaster from frozen and are indistinguishable from fresh.
With the scald, expect: day one and two excellent for sandwiches, day three good, day four toast. Without the scald, that timeline shortens by a full day.
Do I need vital wheat gluten?
No, but it helps, and there is no shame in it.
Vital wheat gluten is dried wheat protein. Adding 2% to a 100% wholemeal dough gives the gluten network extra material to work with, offsetting some of the damage the bran does. The loaf comes out perhaps 10–15% taller with a more even crumb.
Bake it without first. If your loaf is good, leave it out; fewer ingredients is better. If it is dense and you have already ruled out under-proofing, add 10 g and bake it again.
What you should not do is add it as insurance to a recipe that is failing for another reason. Under-fermentation and a lukewarm oven are far more common culprits, and gluten won’t fix either.
When it goes wrong
| What happened | Most likely cause | Fix next time |
|---|---|---|
| Dense, heavy, didn’t rise in the tin | Under-proofed | Wait for the 1 cm crown, not the clock |
| Rose beautifully, collapsed in the oven | Over-proofed | Bake when the poke fills back slowly, not instantly |
| Gummy, damp middle | Under-baked, or sliced too soon | Probe for 96–98 °C; wait two hours to cut |
| Big hole under the top crust | Slack shaping — gap in the roll | Roll tighter, press the seam as you go |
| Tore down one side | Over-proofed, or seam placed on the side | Seam-side down, and bake a little earlier |
| Pale, soft, anaemic crust | Oven too cool, or pulled too early | Start at 200 °C; bake to deep brown |
| Dough was a sticky mess | Judged hydration before the 30-minute rest | Trust the rest; don’t add flour |
| Crumbles when sliced thin | No scald, or under-hydrated | Use the scald; hold the 80% |
| Rock hard by day two | No scald | Use the scald |
| Tastes bitter | Flour was hot off the mill, or over-fermented | Let flour cool 10 minutes; watch the bulk rise |
The two that account for most disappointing loaves are proofing by the clock instead of by the crown, and slicing too soon. Both are free to fix.
Can I make this with sourdough instead?
Yes. Swap the 7 g of instant yeast for 100 g of active starter at peak, and take 50 g off the water to compensate for the starter’s own hydration.
Everything else holds: the scald, the rest, the shaping, the 1 cm crown, the 96 °C internal temperature. What changes is time. Bulk rise becomes 4–5 hours rather than one, and the final proof 2–3 hours. Or shape it, put it in the fridge overnight, and bake it straight from cold in the morning, adding 5 minutes to the bake.
If your starter isn’t reliably doubling within 6–8 hours of a feed, stay with yeast for now. Our guide to starting a sourdough starter with fresh-milled flour covers getting it there.
Frequently asked questions
Can I make a 100% wholewheat sandwich loaf that’s actually soft?
Yes, and the scald is what makes it possible. Pour 180 g of boiling water over 60 g of your flour, let it cool, and add it to the dough. The gelatinised starch holds water through baking, giving a softer crumb and slower staling. Combined with 80% hydration, 6% butter and a proper 30-minute rest after mixing, a 100% fresh-milled tin loaf slices thin without crumbling.
What is a scald and can I skip it?
A scald (also called tangzhong or yukone) is flour cooked with boiling water until the starch gelatinises. You can skip it, but the loaf will be noticeably drier and will stale a full day sooner. It takes two minutes and 60 g of the flour you already milled.
How fine should I mill flour for a sandwich loaf?
As fine as the mill will go. On a Sana mill, adjust finer until you just hear the stones touch, then back off one notch. Finer grinding means smaller bran particles, which do less damage to the gluten network. If the motor labours, mill once coarse and run it through again on fine.
Why is my wholewheat loaf gummy in the middle?
Almost always one of two things: the internal temperature never reached 96 °C, or you sliced it before it had cooled for two hours. A skewer thermometer reading 96–98 °C in the centre of the loaf rules out the first, and two hours on a wire rack rules out the second.
How do I know when a tin loaf is properly proofed?
When the dough has crowned about 1 cm above the rim of the tin at its highest point, and a gentle poke on the side fills back in slowly over two or three seconds. If the dent springs back immediately it needs more time; if it stays dented, bake it now. Don’t proof by the clock, because kitchen temperature changes everything.
Do I need vital wheat gluten in fresh-milled bread?
Not necessarily. Two percent (10 g per 500 g flour) gives a taller loaf with a more even crumb by offsetting some of the gluten damage bran causes. Bake without it first. If the loaf is dense and you have ruled out under-proofing and a cool oven, then add it.
Why does my dough feel too stiff when I mix it, then too wet later?
Bran absorbs water slowly. In the first few minutes the dough feels dry and stiff; half an hour later the bran has finished hydrating and released some of that water back, so the dough goes slack. This is why the recipe rests for 30 minutes before kneading, and why you should never add flour to fresh-milled dough in the first ten minutes.
How long does fresh-milled bread stay fresh?
With a scald, about two days excellent for sandwiches, a third day good, and a fourth day fine for toast. Keep it cut-side down on a board or in a cloth bag for two days, then a plastic bag. Never refrigerate bread, because it stales faster in the fridge than on the counter. Slice and freeze anything you won’t finish by day two.
Can I use this recipe with sourdough starter?
Yes. Replace the 7 g of instant yeast with 100 g of active starter at peak and reduce the water by 50 g. Bulk rise becomes 4–5 hours instead of one, and the final proof 2–3 hours. Everything else stays the same: the scald, the rest, the 1 cm crown and the 96 °C finish.
Which wheat should I use for sandwich bread?
Hard red or hard white wheat. Hard red gives a nuttier, more assertive loaf; hard white is milder and slightly sweeter, and it is the easier sell to a household used to shop white bread. Avoid soft wheat, which has too little protein to support a tin loaf’s height.
Mill it on a Sana
Both Sana mills are imported into South Africa directly, carry a 12-year warranty honoured locally, and have spares and support held here rather than in Europe.
- Sana Grain Mill: 360 W, 100 g/min, 850 g hopper, 85 mm ceramic-corundum stones, solid beechwood. Mills this loaf’s flour in five minutes.
- Sana Grain Mill MAX: 600 W, 200 g/min, 1,200 g hopper. For baking in volume.
More in the home-milling library: your first loaf with fresh-milled flour · starting a sourdough starter · where to buy grains in South Africa
