
Blog
Your First Loaf With Fresh-Milled Flour: The 70/30 Recipe

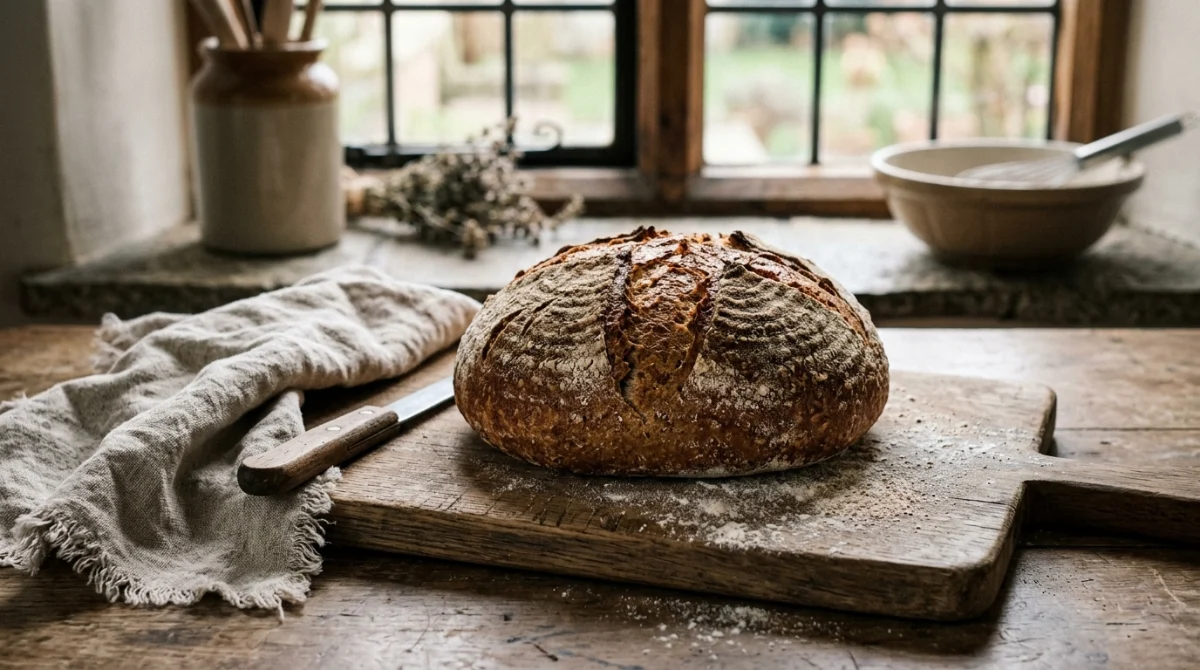
Your first loaf with fresh-milled flour should be a 70/30 blend: 70% whole grain you’ve just milled, 30% white bread flour. It makes a real, delicious, noticeably good loaf, it’s forgiving enough to succeed on the second or third try, and it’s the fastest way to understand what makes fresh-milled bread different before you tackle 100%.
If you’ve already baked a few loaves from commercial flour and you’ve got your mill up and running, this is where to start.
On this page
- Why your first loaf with fresh-milled flour should be 70/30
- What you need before you start
- Which grain to mill first
- Grind setting and milling technique
- The recipe
- Step by step
- What the dough looks and feels like at each stage
- What could go wrong
- When to move to 100% fresh-milled flour
- Frequently asked questions
Why your first loaf with fresh-milled flour should be 70/30
If you go straight to 100% fresh-milled whole grain, your first loaf will probably be a flat brick. Not because you did anything wrong; the odds are just against you.
Fresh-milled whole grain flour has bran particles in it that behave like tiny blades in the dough: they physically cut the gluten strands as they develop. The flour absorbs water differently than store-bought flour, and it absorbs it at a different rate. The fermentation moves faster and less predictably. And there’s no room for error on shaping, because the dough has less tensile strength.
The 30% white bread flour acts as a scaffold. It provides reliable, well-developed gluten that the whole grain structure can piggyback on. You get:
- A dough that holds its shape after shaping
- More predictable fermentation timing
- A proper oven spring instead of a sideways blob
- A crumb that’s actually worth eating
The loaf still tastes like fresh-milled bread, because the 70% whole grain dominates, but you have a fighting chance on your first three or four bakes. Once you’re getting consistent results with this recipe, move up to 80/20, then 90/10, then 100%. By then you’ll have a feel for the dough and you’ll know what you’re looking for. (If you want the nutrition case before you start, EcoHub has been through the evidence on whether fresh-milled flour is actually healthier.)
What you need before you start
Grain: Hard red or hard white wheat berries. Not soft wheat (too low in protein for bread). If you’re ordering from our grain sourcing guide, hard red wheat is the most widely available and the most forgiving to bake with. Buy 2–5 kg to start.
White bread flour: 30% of your total flour weight. Eureka Mills bread flour or Blue Ribbon bread flour are both good. Sasko bread flour is fine too. You’re using it for structure, not flavour, so don’t overthink the brand.
Sourdough starter: Active, well-fed, at peak or just past peak. Feed it the night before and use it when it’s domed and bubbly. If your starter is sluggish or you’ve only had it a few weeks, the loaf will ferment unpredictably. The starter matters more than almost anything else in this recipe.
Dutch oven (or similar): A cast iron pot with a lid, a clay baker, a Römertopf: anything that traps steam for the first 20 minutes of baking. Without trapped steam, the crust sets before the loaf can rise and you get a dense result regardless of how good the dough is. A regular loaf tin won’t give you the same result.
Banneton or improvised proofing bowl: A wicker proofing basket is ideal. A bowl lined with a well-floured cloth works too. The loaf needs to hold its shape during the cold retard.
Which grain to mill first
Hard red wheat is the default. It has high protein content (typically 12–14%), produces good gluten, and gives a nutty, robust loaf with a dark, golden crust. It’s what most home millers use for their everyday bread.
Hard white wheat is milder and lighter in colour. The loaf is less assertive, which is good if you’re moving over from commercial white bread and want something subtler. Same protein levels, slightly sweeter flavour.
Spelt is lovely but extensible: the dough spreads rather than holding tight. Leave it for your third or fourth loaf once you’ve got a feel for things.
Don’t use rye for the bulk of your first loaf. It’s low in gluten and behaves completely differently. A small amount in your starter is fine; as the main flour, wait until you’ve got experience.
Grind setting and milling technique
Set your Sana Grain Mill to its finest setting. Run the mill empty for 30–60 seconds to let the stones settle to their calibration before you feed grain in.
Feed grain in a slow, steady stream, not all at once. Feeding too fast causes the mill to struggle and can result in coarser flour. You’ll hear the difference: a steady rhythmic grinding is right; a straining, slowing sound means you’re going too fast.
Mill your 350 g and let the flour rest in the bowl for 10–15 minutes before you use it. Fresh-milled flour comes out slightly warm, and adding it to the dough while it’s hot can stress your starter and affect enzyme activity. Just let it breathe.
The recipe
| Ingredient | Weight | Baker’s % |
|---|---|---|
| Fresh-milled hard wheat flour | 350 g | 70% |
| White bread flour | 150 g | 30% |
| Water (room temperature) | 380 g | 76% |
| Active sourdough starter | 100 g | 20% |
| Fine salt | 9 g | 1.8% |
Total dough weight: approximately 989 g. Expected baked loaf: around 750–800 g after oven loss.
These quantities make one medium loaf, a 22 cm oval or boule, roughly the size of what you’d buy at a good bakery. If you want to practise with a smaller amount, scale down by 40% (210 g fresh flour, 90 g bread flour, 228 g water, 60 g starter, 5.5 g salt). It lowers the stakes while you’re learning.
Step by step
1. Mill the flour (day before or morning of)
Mill your 350 g of hard wheat on the finest setting. Set aside to cool.
2. Autolyse — 1 hour (no starter, no salt)
Combine both flours and 350 g of the water (hold back 30 g). Mix until no dry flour remains. Cover the bowl with a plate or damp cloth. Leave it for 1 full hour at room temperature.
The autolyse does several things at once. It gives the bran time to fully hydrate (which takes longer than the white flour), it starts gluten development without any kneading, and it lets the flour’s own enzymes begin breaking down some of the proteins, which makes the dough more extensible without losing strength.
You don’t need to do anything for this hour. Walk away.
3. Add starter — 30 minutes
Add the starter to the autolysed dough. Use your hand like a claw to fold the starter in, then squeeze the dough repeatedly through your fingers. It’ll look like a mess; keep going. Add the remaining 30 g of water now, slowly, giving the dough a minute to absorb each addition.
Once the starter is incorporated, cover and rest for 30 minutes.
4. Add salt
Dissolve the salt in a tiny splash of water (5 g or so). Pour it over the dough and work it in the same way, clenching and squeezing until it’s fully incorporated. The dough will feel smoother and slightly tighter after the salt goes in.
5. Bulk fermentation — 4 to 6 hours
This is the stage where the dough develops and the flavour builds. At 24–26 °C (a warm kitchen), expect 4–5 hours. At 20–22 °C (a cool kitchen in winter), budget 5–7 hours.
During the first 2–3 hours, perform stretch and folds every 30 minutes. For each set: wet your hand and grab the dough on one side; stretch it up as high as it’ll go without tearing, then fold it over to the opposite side; rotate the bowl 90 degrees and repeat. Four sides is one set. Do 4–6 sets, then let the dough rest undisturbed for the remainder of bulk.
After 3–4 sets you’ll feel the dough change. It stops being sticky and shaggy and becomes smooth, extensible and noticeably stronger. When you pull it, it comes away cleanly and has a slight sheen. This is what you’re waiting for.
How do you know bulk fermentation is done? Look for a 50–75% increase in volume (not quite doubled: fresh-milled whole grain rarely doubles the way white flour dough does), a domed surface with a gentle wobble when you shake the bowl, and small bubbles visible at the sides of the bowl.
Don’t rely on the clock alone. A cold kitchen stretches timing; a warm day shortens it. Learn to read the dough.
6. Pre-shape
Tip the dough gently onto an unfloured surface. Use a bench scraper to drag it across the surface while cupping it with your other hand. This creates surface tension without degassing the dough. You’re not aggressively folding here; you’re tightening the outer skin.
Let it rest on the bench, uncovered, for 30 minutes. It will spread slightly, and that’s fine.
7. Final shape
Shape into a tight boule (round) or bâtard (oval), whichever fits your proofing container. The key is surface tension: you want the outer skin tight enough to hold the loaf’s shape for the next 12 hours and then expand in the oven without tearing wildly.
Place the shaped loaf seam-side up in a well-floured banneton or cloth-lined bowl. Dust the top with rice flour. It doesn’t absorb into the dough, and it makes scoring and releasing easier than regular flour does.
8. Cold retard — 10 to 16 hours
Cover the banneton with a plastic bag or shower cap and place in the refrigerator. The dough will slowly continue rising and fermenting overnight. Don’t rush this by going in at 6 hours; the full overnight retard makes a real difference to flavour and structure. You can leave it for up to 18 hours if needed.
9. Bake
Preheat your oven to 250 °C (or as high as it will go) with the Dutch oven inside for 45 minutes minimum. Not 20 minutes. The full preheat makes the difference between good oven spring and a flat loaf.
When the oven is ready, take the Dutch oven out carefully, remove the loaf from the banneton onto a small piece of baking paper, score with a sharp blade at a 30–45 degree angle in one confident cut, lower the loaf in using the baking paper, put the lid on and get it into the oven immediately.
Bake 20 minutes with the lid on. Trapped steam gives you an open crumb and oven spring.
Remove the lid and bake a further 20–25 minutes until the crust is deep brown. Not golden: properly dark. If you’re nervous about the colour, you’re probably underbaking, and underbaked loaves are gummy inside.
Remove from the Dutch oven and cool on a rack. Wait at least 90 minutes before cutting. Cutting too soon releases steam and the crumb collapses back into a gummy mess.
What the dough looks and feels like at each stage
| Stage | What it looks like | What it means |
|---|---|---|
| After autolyse | Shaggy, rough, a bit dry-looking | Normal — give it time |
| After adding starter | Sticky, sloppy, pulling apart | Normal — the starter is wet, keep mixing |
| After first fold | Still a bit messy but starting to hold | On track |
| After 3rd or 4th fold | Smooth, stretchy, holds its shape when pulled | This is what you’re aiming for |
| End of bulk | Domed, slightly wobbly, bubbles at edges | Ready to shape |
| After pre-shape | Slightly slack, spread a little | Expected — 30 min rest tightens it |
| After final shape | Smooth, tight, holds a round or oval shape | Good |
| After cold retard | Firm, risen noticeably, doesn’t feel fragile | Ready to bake |
The critical danger point is during the first hour after adding the starter. Beginners see the sticky, sloppy dough and add more flour. Don’t. The dough will come together during the folds. Adding flour at this stage is the most common reason for dense bricks.
What could go wrong
| Problem | Most likely cause | Fix |
|---|---|---|
| Dense, low brick | Under-fermented in bulk | Let it go longer; check kitchen temperature |
| Flat, spreading blob | Over-fermented, or dough not tight enough at shaping | Shorter bulk; practise shaping |
| Gummy inside | Under-baked, or cut too soon | Darker crust, longer bake; wait 2 hours after baking |
| Doughy ring around the base | Dutch oven not hot enough | Full 45-minute preheat at max temperature |
| Very thick, hard crust | Too long with lid off; oven too dry | Reduce lid-off time by 5 minutes |
| Huge crack on the side | Scored too shallow, or loaf spread rather than up | Deeper score; tighter shaping |
| Tastes too sour | Bulk ran too long; cold retard too long | Shorter bulk time; pull from fridge after 10 hours |
| Not sour enough | Quick bulk; short retard | Longer bulk; 16-hour retard |
The most common failure is under-fermentation. When in doubt, give it another 30 minutes and check again.
When to move to 100% fresh-milled flour
When this 70/30 loaf is working consistently (three or four good bakes in a row, predictable timing, decent oven spring) you’re ready to move up.
Increase the fresh-milled percentage by 10% at a time. Go to 80/20, bake it three times. Then 90/10. Then 100%. Each step will make the dough slightly stickier and the fermentation slightly less predictable. At 100%, you’ll probably need to add 5–8% more water (up to 82–85% hydration), and your bulk fermentation will run 30–60 minutes faster than this recipe.
Everything else stays the same. The process you’ve learned here is the process.
Frequently asked questions
Can I use a bread machine or stand mixer instead of hand mixing?
A stand mixer with a dough hook works well for the initial incorporation. Set it to low for 2–3 minutes after adding the starter, then continue with hand folds for bulk fermentation. Bread machines (in dough mode) work in a pinch for the early mixing but tend to over-develop gluten before the autolyse has done its job. Hand mixing is slow but gives you the most control, and fresh-milled dough benefits from a gentle touch.
My starter is young — will this recipe still work?
If your starter is less than three weeks old and isn’t reliably doubling within 6–8 hours of feeding, it’s not ready for this recipe. Use it in a small amount (50 g) and add ¼ teaspoon of instant yeast to the dough as a backup. The loaf won’t have the full sourdough character, but you’ll learn the process and you’ll get a result. Give your starter another two weeks of daily feeding, then retry with the full recipe.
Can I use this recipe with rye or spelt instead of hard wheat?
Rye: no, not as the main flour. It doesn’t have enough gluten to support a sourdough structure, though you can add up to 10–15% rye to this recipe without significant change. Spelt: yes, but with modifications. Spelt is extensible rather than elastic, and it tears when you handle it too aggressively. Do a longer autolyse (90 minutes), fewer folds in bulk, and be very gentle with shaping. Expect a slightly flatter loaf with a more open crumb.
What if I don’t have a Dutch oven?
You can bake on a preheated pizza stone or heavy baking tray, with an inverted roasting pan over the loaf for the first 20 minutes to trap steam. Remove the pan for the last 20–25 minutes. Results are slightly less consistent than a Dutch oven but can still be very good.
Why does the recipe use 20% starter?
20% is on the higher side of typical and is intentional for fresh-milled flour. The higher proportion means more lactic acid bacteria and a stronger initial fermentation kick, which is useful when the flour itself is also pushing fermentation faster. Lower-starter recipes (8–12%) produce more complex flavour over longer ferments, but they’re less forgiving if your kitchen is cool or your starter is slightly below peak.
My loaf didn’t spring in the oven at all. What went wrong?
Either the dough over-fermented during bulk and lost structure, the Dutch oven wasn’t hot enough, or the scoring was too shallow. The most common is over-fermentation, because fresh-milled flour ferments faster than commercial flour. When in doubt, go to the fridge earlier. You can always give it more cold retard time, but you can’t undo a collapsed dough.
How do I store the loaf? Can I freeze it?
Cut side down on a wooden board, or in a fabric bread bag. Don’t use plastic, which traps moisture and softens the crust. The loaf is best on days 1 and 2; on days 3 and 4 it’s ideal for toast. If you won’t finish it, slice and freeze after day 2 and toast the slices straight from frozen.
